


$12.99 when purchased online
Target Online store #3991
About this item
Highlights
- Key Features:
- Easy application: Fool-proof, fast curing formula
- Molded shape: Curved volume is molded to nail shape, it's thicker in the center and thinner at the cuticle for superior fit our proprietary DOME EFFECT™
- Mega volume: Plump volume that masks imperfections for an even pro-finish.
- Mirror shine: Rich vibrant color with light reflecting particles delivers brilliant shine.
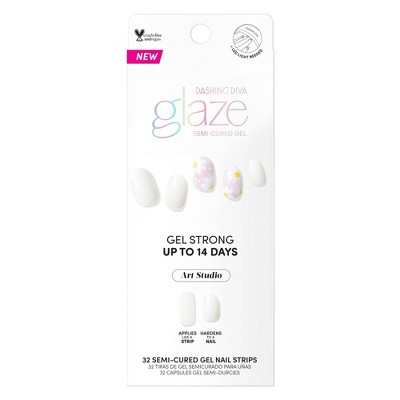
- Gel strong up to 14 days: Lasting shine, durable wear that's chip-proof and scratch-proof.
- |Vegan, Cruelty-Free, and 10-Free
Description
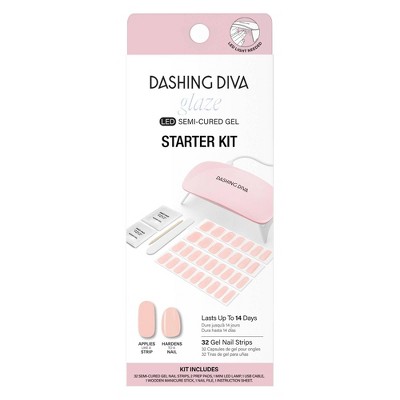
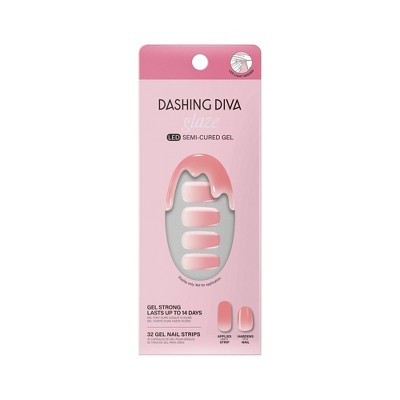
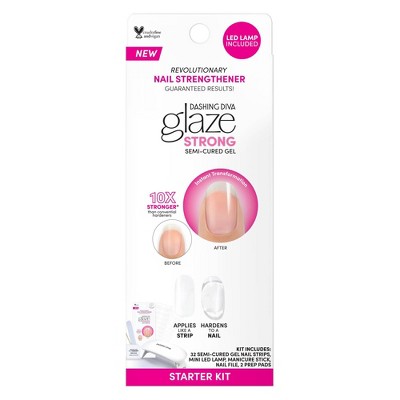
Stop it, I'm blushing! Shades of light pink gel nail strips featuring subtle foiled accents and a velvet finish effect with mega volume & maximum shine. Get the pro-finish and sculpted effect of a salon gel manicure at home with ease. GLAZE innovation is a semi-cured gel strip that cures under an LED lamp, delivering salon results: molded shape, mega volume, mirror shine that's gel strong for up to 14 days.
Includes: 32 semi-cured gel nail strips (in 12 sizes), Nail file, Manicure stick, 2 Prep pads, Instruction Sheet
How To Use:
STEP 1: PREP
•Wash hands with soap and water.
• Shape nails and push back cuticles.
• Use enclosed Prep Pad to ensure nails are clear from oils and residue.
• Make sure your nails are completely dry before application.
Pro Tip: Because GLAZE is an all-in-one product, no additional Base Coat or Nail Strengthener is needed.
STEP 2: SELECT SIZE
• Hold the sheet over nail to find your size. If you are in-between sizes, always size down.
STEP 3: REMOVE FILM
• Remove the protective film.
STEP 4: APPLY
• Gently lift strip from sheet starting from edge.
• Place strip over the center of your nail, starting at cuticle line and pressing outward. For optimal adhesion, the strip should be placed above the cuticle line avoiding skin or cuticles.
STEP 5: PRESS
• Press down firmly from center and side to side.
STEP 6: TRIM
• Trim strip flush to your nails using nail scissors or nail clippers.
STEP 7: CURE
• Cure under LED light for 45 seconds.
STEP 8: FILE
• Position the nail file horizontally along the contour of your nail. With one sweeping motion, file firmly across your free edge. Make sure GLAZE does not exceed beyond your nail length. Any overhang will cause chipping or cracking.
Pro Tip: Using the wooden manicure stick gently press down on Glaze strip thoroughly to seal all edges before curing. This will prevent hair and debris from catching onto the nail strip perimeter.
How to Remove:
STEP 1: REMOVE
• Apply cuticle oil on nail bed.
STEP 2: LIFT
• Use manicure stick to gently and slowly lift nail strip from corner of the cuticle area.
• Gradually push the strip off your nail.
CAUTION: Do not peel off with force or in one quick motion.
Number of Pieces: 34
Color Finish: Gloss
Color Palette: Bright Tones
TCIN: 87299608
UPC: 096100130549
Item Number (DPCI): 052-06-7630
Origin: Imported
If the item details above aren’t accurate or complete, we want to know about it.
Shipping details
Estimated ship dimensions: 7 inches length x 3 inches width x 1 inches height
Estimated ship weight: 0.05 pounds
Return details
This item can be returned to any Target store or Target.com.
This item must be returned within 90 days of the date it was purchased in store, shipped, delivered by a Shipt shopper, or made ready for pickup.
See the return policy for complete information.
Frequently bought together
Guests also viewed
$12.99
$5 Target GiftCard with $30 on select personal care
4 out of 5 stars with 91 ratings
$12.99
$5 Target GiftCard with $30 on select personal care
3 out of 5 stars with 114 ratings
$12.99
$5 Target GiftCard with $30 on select personal care
4.6 out of 5 stars with 29 ratings
$12.99
$5 Target GiftCard with $30 on select personal care
4.6 out of 5 stars with 17 ratings

$7.99
$5 Target GiftCard with $30 on select personal care
4 out of 5 stars with 122 ratings
$10.99
$5 Target GiftCard with $30 on select personal care
3.3 out of 5 stars with 7 ratings
Discover more options
$12.99
$5 Target GiftCard with $30 on select personal care
4 out of 5 stars with 91 ratings
$12.99
$5 Target GiftCard with $30 on select personal care
3.5 out of 5 stars with 156 ratings
$12.99
$5 Target GiftCard with $30 on select personal care
3 out of 5 stars with 114 ratings
$12.99
$5 Target GiftCard with $30 on select personal care
3.5 out of 5 stars with 228 ratings
$7.99
$5 Target GiftCard with $30 on select personal care
4 out of 5 stars with 122 ratings
$12.99
$5 Target GiftCard with $30 on select personal care
4.6 out of 5 stars with 29 ratings
Related Categories
Guests are saying
Guests appreciate the ease of application and the beautiful finish of these nail strips, making them a great choice for busy individuals seeking a salon-quality look at home. Many find the colors and designs appealing, especially the nude shades and glitter accents. However, some guests have experienced issues with longevity and adherence, suggesting that proper application is key to achieving the best results. Overall, these strips offer a convenient alternative to traditional manicures.
Summary created by AI from text of reviews reflecting recent feedback provided across different star ratings (includes incentivized reviews)
4.0 out of 5 stars with 93 reviews
easy to apply: 3.92 out of 5
easy to remove: 4.52 out of 5
long lasting: 3.39 out of 5
quality: 3.5 out of 5
value: 3.42 out of 5
58% would recommend
29 recommendations
Cute but they don't last.
1 out of 5 stars
Thumbs down graphic, would not recommend
EV52 - 1 month ago, Verified purchaser
For starters, the sizing seemed off. Unfortunately, they didn’t last more than 24 hours.
Long Term Fan
5 out of 5 stars
Thumbs up graphic, would recommend
Kate A - 2 months ago
I love Dashing Diva and have been using for years though I’m only just now using my Glaze sets that I’ve been accumulating. Work great and adhere well if you take your time and prep well. File nails, buff, push cuticles, and wipe down with alcohol. I push each strip down well with an orange stick, and before I cure, I run a nail brush with 100% acetone around edges and push down again. I seal with a top coat at the end because I like a thick look and it caps the ends. Takes me about 45-50 minutes but lasts 2+ weeks with minimal hair snagging and for super cheap. Worth figuring out your method.
Feminine and wonderful nude!
5 out of 5 stars
Alicia M. - 5 months ago
originally posted on dashingdiva.com

I love this color! I’ve been wanting an ombre nude with a little something extra and these are perfect! My husband even commented how salon quality they look.
Eh. One day nails.
2 out of 5 stars
Thumbs down graphic, would not recommend
Ash - 8 months ago
I love how easy they are to put on. But the edges lift easily and pulls my hair. After Andre hours I had to take them off. Easy to peel off.
1 reply from DashingDiva_USA team - 8 months ago
Oh no! We’re very sorry to hear about your less than positive experience. Please feel free to send a message over to Customer Service at info@dashingdiva.com and our team would be more than happy to provide tips and troubleshooting assistance. Please attach any photos you have with the set on you. Kindly be aware that our team is available Monday to Thursday from 9:00 am to 5:00 pm EST and on Friday from 9:00 am to 1:00 pm. Best, The Dashing Diva Team
Didnt even last a day on my nails
1 out of 5 stars
Thumbs down graphic, would not recommend
jsstewart727 - 8 months ago
Put these on while getting ready for a work event. By the time I was done curling my hair, 3 had popped off. By the end of the night, I had 2 left. I ended up just peeling them off. I cured twice on each hand, too, which didn’t seem to help at all. Definitely would not recommend!
1 reply from DashingDiva_USA team - 8 months ago
Oh no! We’re very sorry to hear about your less than positive experience. Please feel free to send a message over to Customer Service at info@dashingdiva.com and our team would be more than happy to provide tips and troubleshooting assistance. Please attach any photos you have with the set on you. Kindly be aware that our team is available Monday to Thursday from 9:00 am to 5:00 pm EST and on Friday from 9:00 am to 1:00 pm. Best, The Dashing Diva Team
I LOVE THEM!!!
5 out of 5 stars
Thumbs up graphic, would recommend
Bob - 8 months ago, Verified purchaser
I don’t understand how some people are saying they’re trash or that they “pop off.” I think they just don’t know how to apply or don’t prep the nail properly because these were EXTREMELY quick easy to apply AND they look like an EXPENSIVE mani. I normally do my own gel ex manis but since having a baby, I don’t have the time or the patience for it. I’ve been wanting a mani so bad but kept putting it off because of the work I have to put into them and I hate press ons but I came across these. I figured I’d give them a try. ABSOLUTELY BEAUTIFUL, EASY, and QUICK. Perfect for moms who don’t have the time. These are gonna be my new go to for manis. I’m getting more designs.
1 reply from DashingDiva_USA team - 8 months ago
We're so happy to hear that! Thank you for being a loyal customer!
Perfectly Nude
5 out of 5 stars
Amanda A. - 8 months ago
originally posted on dashingdiva.com
These are the perfect nude shade! I always struggle to find one that I like and goes with my skin tone. The only issue I have with any of these is the gel lifting as they grow out creating a ridge that my hair gets stuck under when styling my hair. Other than that these are an awesome product!
Salon Nails Without The Price!
4 out of 5 stars
Thumbs up graphic, would recommend
Lumang - 10 months ago, Verified purchaser
OMG I am IMPRESSED by these! You get the nail salon look without the price 🤩. They came out so well! 😃. It was my first time using these and it did take me quite some time cause I messed up on two nails 🫣. I wish they had more sizing available for smaller nail beds, but I made it work! I will be sticking to these, rather than the press ons.
My Favorite
5 out of 5 stars
Linda J. - 1 year ago
originally posted on dashingdiva.com
I absolutely love the Velvet Blush. The color is a very pretty neutral with accent nails in a slight sparkle. They last forever. I always order when they are in stock!
Sizing way off
1 out of 5 stars
Thumbs down graphic, would not recommend
Dmommy1127 - 1 year ago, Verified purchaser
Sizing is horrible. Length is fine but thickness not so much. I thought it be easier than polishing my nails but it took me 3 times as long. Not sure how long they will last but don’t care because the time it took to put them on doesnt justify lonetivity.
My Favorite!
5 out of 5 stars
Nyki22 - 1 year ago
originally posted on dashingdiva.com
This color is by far my favorite color design glaze strips. I have repurchased them several times! You will not be disappointed!
Don't waste money
1 out of 5 stars
Thumbs down graphic, would not recommend
Ameyers4 - 1 year ago
Don't adhere and don't cure
1 reply from DashingDiva_USA team - 1 year ago
Oh no! We’re very sorry to hear you had trouble with GLAZE. Please feel free to send a message over to Customer Service at info@dashingdiva.com and our team would be more than happy to provide tips and troubleshooting assistance. Best, The Dashing Diva Team
Subtle and beautiful
5 out of 5 stars
Tisha - 1 year ago
originally posted on dashingdiva.com
This is not a set I would have chosen for myself, but I'm glad my sister chose them for me! I prefer the non-glittery nails in the set, but at the right angle, they all match. (The glitter nails are sort of holographic.) This is my first Glaze set, and while they are certainly more finicky than Gloss, they do have a nice finish when applied properly. They do snag easily unless applied exactly right.
My Forever Go To
5 out of 5 stars
Thumbs up graphic, would recommend
Sweet Darlin - 1 year ago
I have been using these for years and they are the best I have ever used and the only thing that keeps my nails from breaking. Anyone who says they do not last, did not do the application process correctly. These will last me over two weeks!!
Velvety Goodness
5 out of 5 stars
Alicia - 1 year ago
originally posted on dashingdiva.com
Velvet Blush is a perfect neutral with a little bit of glam! The velvet nails are hard to stop staring at when wearing this set 😍
Dont buy
1 out of 5 stars
Thumbs down graphic, would not recommend
Sammie - 1 year ago
Doesn’t last more than a few hours. Even after spend time prepping, not worth it. Waste of money.
1 reply from DashingDiva_USA team - 1 year ago
Oh no! We’re very sorry to hear about your less than positive experience. Please feel free to send a message over to Customer Service at info@dashingdiva.com and our team would be more than happy to provide tips and troubleshooting assistance. Kindly be aware that our team is available from Monday through Friday, 9 am to 5:00 pm EST. We will get back to you within 5-7 days. Best, The Dashing Diva Team
Nude? Perfect!
5 out of 5 stars
Thumbs up graphic, would recommend
Mom3j - 1 year ago, Verified purchaser
Pleasantly surprised by the nude color and subtle shimmer accents! This is my second attempt at applying semi cured nail strips to my gel-x like extensions and it turned out awesome.
Save your money
1 out of 5 stars
Thumbs down graphic, would not recommend
Lilah - 1 year ago, Verified purchaser
Doesn’t stay and is very awkward to wear. Only last a couple of hours.
1 reply from DashingDiva_USA team - 1 year ago
Oh no! We’re very sorry to hear about your less than positive experience. Please feel free to send a message over to Customer Service at info@dashingdiva.com and our team would be more than happy to provide tips and troubleshooting assistance. Kindly be aware that our team is available from Monday through Friday, 9 am to 5:00 pm EST. We will get back to you within 5-7 days. Best, The Dashing Diva Team
Pretty Nails !!
4 out of 5 stars
Thumbs up graphic, would recommend
mar - 1 year ago
I love how these nails turned out! I cured for much over the suggested time because I decided to add length, and it worked great! The only issue was getting the lamp set up, but I got it working!
Pretty but do not recommend
1 out of 5 stars
Thumbs down graphic, would not recommend
Hypmom - 1 year ago, Verified purchaser
It’s beautiful but it did not cure in 45 seconds like the instructions say. I don’t know if it’s gonna last the 14 days. Maybe if you don’t do anything but look pretty all day and do no chores?