Sponsored


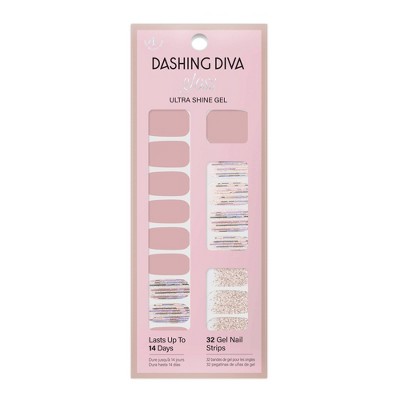
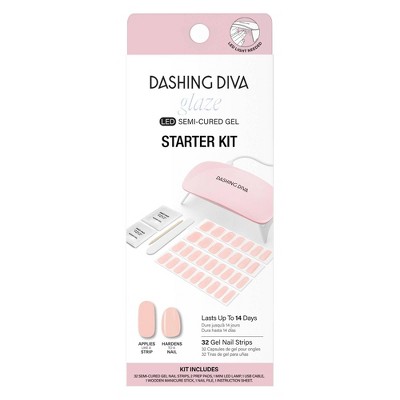
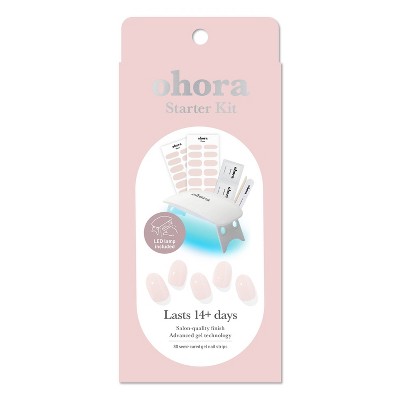
Dashing Diva Glaze Semi-Cured Gel Nail Polish Strips Starter Kit - 32ct
$12.99
ColorClear


In Stock
Eligible for registries and wish lists
Sponsored
About this item
Highlights
- QUICK & EASY: Easy-to-apply, fast-curing formula.
- MOLDED SHAPE: Voluminous center x thin cuticle edge design sculpts and adds definition to nail shape.
- MEGA VOLUME: Plump gel that masks imperfections for a smooth finish.
- MIRROR SHINE: Rich, bold color with light-reflecting particles deliver brilliant shine.
- EVEN SURFACE: Three perfectly-layered coats of gel polish create an always-even surface.
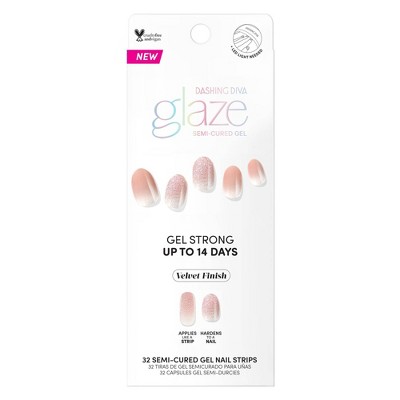
- GEL STRONG: Lasting shine and durable wear for up to 14 days.
Description
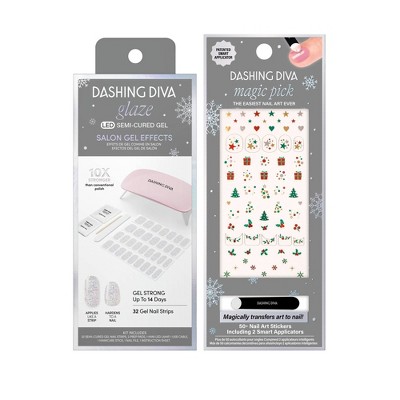
A complete starter kit to achieve the pro-finish and sculpted effect of a salon gel manicure at home with ease. GLAZE Semi-Cured Gel Nail Strips deliver salon-sculpted results with a mirror shine that lasts up to 14 days. These all-in-one nail strips are designed with a base coat, color coat, and top coat. GLAZE cures under the light of an LED lamp in just 60 seconds, creating a pro-finish, salon gel manicure at home.
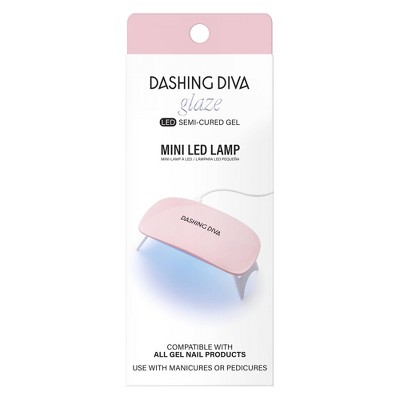
INCLUDES: 32 semi-cured gel nail strips (in 12 sizes), 2 prep pads, 1 LED Mini Lamp, 1 nail file, 1 manicure stick.
How To Use:
STEP 1: PREP
• Wash hands with soap and water.
• Shape nails and push back cuticles.
• Use enclosed Prep Pad to ensure nails are clear from oils and residue.
• Make sure your nails are completely dry before application.
Pro Tip: Because GLAZE is an all-in-one product, no additional Base Coat or Nail Strengthener is needed.
STEP 2: SELECT SIZE
• Hold the sheet over nail to find your size. If you are in-between sizes, always size down.
STEP 3: REMOVE FILM
• Remove the protective film.
STEP 4: APPLY
• Gently lift strip from sheet starting from edge.
• Place strip over the center of your nail, starting at cuticle line and pressing outward. For optimal adhesion, the strip should be placed above the cuticle line avoiding skin or cuticles.
STEP 5: PRESS
• Press down firmly from+C2:D3 center and side to side.
STEP 6: TRIM
• Trim strip flush to your nails using nail scissors or nail clippers.
STEP 7: CURE
• Cure under LED light for 60 seconds.
STEP 8: FILE
• Position the nail file horizontally along the contour of your nail. With one sweeping motion, file firmly across your free edge. Make sure GLAZE does not exceed beyond your nail length. Any overhang will cause chipping or cracking.
Pro Tip: Using the wooden manicure stick gently press down on Glaze strip thoroughly to seal all edges before curing. This will prevent hair and debris from catching onto the nail strip perimeter.
How to Remove:
STEP 1: REMOVE
• Apply cuticle oil on nail bed.
STEP 2: LIFT
• Use manicure stick to gently and slowly lift nail strip from corner of the cuticle area.
• Gradually push the strip off your nail.
CAUTION: Do not peel off with force or in one quick motion.
Number of Pieces: 32
Color Finish: Gloss
Color Palette: Bright Tones
TCIN: 87299605
UPC: 096100130556
Item Number (DPCI): 052-06-8011
Origin: Imported
If the item details aren’t accurate or complete, we want to know about it.
Ingredients:
glaze: acrylates copolymer, polyurethane-11, dipentaerythrityl pentaacrylate, acrylates crosspolymer, polyester-5, synthetic fluorophlogopite, polyethylene terephthalate, polyurethane-33, aluminum hydroxide, tin oxide. may contain: chromium oxide green, iron oxides, red 36, manganese violet, blue 1 lake, titanium dioxide, aluminum prep pad: isopropyl alcohol, water/aqua/eau' '
Allergens & Warnings:
WARNING: FLAMMABLE. AVOID DIRECT OR CLOSE CONTACT TO FLAME OR EXTREME HEAT. KEEP AWAY FROM DIRECT SUNLIGHT. KEEP OUT OF REACH OF CHILDREN.Shipping details
Estimated ship dimensions: 1.81 inches length x 2.81 inches width x 6.94 inches height
Estimated ship weight: 0.27 pounds
Return details
This item can be returned to any Target store or Target.com.
This item must be returned within 90 days of the date it was purchased in store, shipped, delivered by a Shipt shopper, or made ready for pickup.
See the return policy for complete information.
Guests also viewed
Discover more options

Related Categories
Guests are saying
Guests appreciate the easy and fast application of the glaze nail strips, with many noting the beautiful colors and affordability compared to salon visits. The product holds up well for several days, making it a convenient option for busy individuals. However, some guests experienced issues with the LED lamp and durability, leading to mixed feelings about the overall quality. Despite some drawbacks, many guests express a desire to repurchase and try different colors.
Summary created by AI from text of reviews reflecting recent feedback provided across different star ratings (includes incentivized reviews)
3.4 out of 5 stars with 608 reviews
easy to apply: 3.55 out of 5
easy to remove: 3.87 out of 5
long lasting: 2.67 out of 5
quality: 2.7 out of 5
value: 2.82 out of 5
41% would recommend
131 recommendations
2 out of 5 stars
Thumbs down graphic, would not recommend
15 November, 2025
The bulky tape look
the idea of this product is genius but it looks really bad even when you follow the directions in its entirety. It reminds me of when I was in elementary trying to pretend I had acrylics on by putting on pieces of tape!!
1 reply from DashingDiva_USA team - 5 days ago
Oh no! We're so sorry to hear about your experience. Please reach out to our Customer Service team at info@dashingdiva.com and we’ll be happy to assist with tips and troubleshooting.
5 out of 5 stars
Thumbs up graphic, would recommend
27 October, 2025
great if you do nail prep!
this kit comes with enough strips to do two sets of nails which i love because u can get a whole month out of that (that’s $6 a set)! the way to get them to look good is by having GOOD NAIL PREP!!! that means pushing back, trimming and removing your cuticles, buffing AND making sure you are putting them on as close to the cuticle as u can and choosing the right size. also after a while these tend to lift a little on the edges. You can’t tell when you look at it, but sometimes your hair can get caught in them. Make sure that you run the cuticle pushed around the nail to press on the edges to make sure they are firmly sealed, and I always go over them twice with the UV light. I got about two weeks use of my first set, and to remove them, I just soaked them in hot water with oil and dish soap and i and was able to just pop them off with no damage.
1 out of 5 stars
27 October, 2025Verified purchase
(no review title)
Save your money
1 reply from DashingDiva_USA team - 22 days ago
Oh no, we’re so sorry about your experience. We’d love the chance to look into it and help how we can—please contact our customer support team at info@dashingdiva.com!
5 out of 5 stars
Thumbs up graphic, would recommend
22 October, 2025
Beautiful nails!!!
Its beautiful. I used the light for few extra minutes to make sure the nails were cured well. It worked perfectly. This picture is after 4 days. My go to nails from now!!!!
1 out of 5 stars
Thumbs down graphic, would not recommend
4 October, 2025Verified purchase
Not good
This is so bad it comes off so easily and I don’t like it. The lamp barely works.
1 reply from DashingDiva_USA team - 2 months ago
Oh no, we’re so sorry about your experience. We’d love the chance to look into it and help how we can—please contact our customer support team at info@dashingdiva.com!
1 out of 5 stars
Thumbs down graphic, would not recommend
2 October, 2025Verified purchase
Chips easily.
I followed all directions, and two of my nails chipped within a day
1 reply from DashingDiva_USA team - 2 months ago
Oh no, we’re so sorry about your experience. We’d love the chance to look into it and help how we can—please contact our customer support team at info@dashingdiva.com!
1 out of 5 stars
20 September, 2025
Do not buy
The heat lamp did not cure the gel strips or even work. The gel strips never hardened and stayed sticky. Would not recommend
1 reply from DashingDiva_USA team - 2 months ago
Oh no! We're so sorry to hear about your experience. Please reach out to our Customer Service team at info@dashingdiva.com, and we’ll be happy to assist with tips and troubleshooting. If possible, please include a photo of your receipt. Our team is available Monday through Friday, from 9:00 AM to 5:00 PM EST.
1 out of 5 stars
Thumbs down graphic, would not recommend
6 September, 2025Verified purchase
Terrible quality
Used the set once in December. Just tried to use the LED light again today in Sept and the light is broken. You can hear a piece inside the lamp. Lamp has been stored in the box since December. Website wont allow a return. I called customer service and they said they can’t exchange or refund it because it is past 90 days. Would not buy again.
1 reply from DashingDiva_USA team - 3 months ago
Oh no! We’re so sorry to hear about your experience. Please contact our Customer Service team at info@dashingdiva.com with a photo of your receipt so we can assist you further. Our team is available Monday–Friday, 9:00 AM to 5:00 PM EST.
2 out of 5 stars
Thumbs down graphic, would not recommend
3 September, 2025Verified purchase
Easy chip
Easy to apply and hardens great! After a few days the gel starts to chip off and its hard sharp pieces.
1 reply from DashingDiva_USA team - 3 months ago
Oh no! We're so sorry to hear about your experience. Please reach out to our Customer Service team at info@dashingdiva.com, and we’ll be happy to assist with tips and troubleshooting. If possible, please include a photo of the set applied to your nails, along with your order number or a photo of your receipt. Our team is available Monday through Friday, from 9:00 AM to 5:00 PM EST.
1 out of 5 stars
Thumbs down graphic, would not recommend
1 September, 2025
Invest that $12.00 instead of buying this.
Like many of the other reviews, the light isn’t strong enough to cure the nail. Save your money and have them done by a pro.
1 reply from dashingdiva team team - 3 months ago
Oh no! We're so sorry to hear about your experience. Please reach out to our Customer Service team at info@dashingdiva.com, and we’ll be happy to assist with tips and troubleshooting. If possible, please include a photo of the set applied to your nails, along with your order number or a photo of your receipt. Our team is available Monday through Friday, from 9:00 AM to 5:00 PM EST.
1 out of 5 stars
Thumbs down graphic, would not recommend
30 August, 2025Verified purchase
Lamp is awful
Lamp did not harden nail stickers even after 8+ attempts
1 reply from dashingdiva team team - 3 months ago
Oh no! We're so sorry to hear about your experience. Please reach out to our Customer Service team at info@dashingdiva.com, and we’ll be happy to assist with tips and troubleshooting. If possible, please include a photo of the set applied to your nails, along with your order number or a photo of your receipt. Our team is available Monday through Friday, from 9:00 AM to 5:00 PM EST.
1 out of 5 stars
Thumbs down graphic, would not recommend
19 August, 2025Verified purchase
Broke of first try
I unplugged the cord to put the LED away, and it pulled out completely. Now, I can't use it.
1 reply from DashingDiva_USA team - 3 months ago
Oh no! We're so sorry to hear about your experience. Please reach out to our Customer Service team at info@dashingdiva.com, and we’ll be happy to assist with tips and troubleshooting. If possible, please include a photo of the set applied to your nails, along with your order number or a photo of your receipt. Our team is available Monday through Friday, from 9:00 AM to 5:00 PM EST.
1 reply from dashingdiva team team - 3 months ago
Oh no! We're so sorry to hear about your experience. Please reach out to our Customer Service team at info@dashingdiva.com, and we’ll be happy to assist with tips and troubleshooting. If possible, please include a photo of the set applied to your nails, along with your order number or a photo of your receipt. Our team is available Monday through Friday, from 9:00 AM to 5:00 PM EST.
1 out of 5 stars
Thumbs down graphic, would not recommend
15 August, 2025
DO NOT BUY!
Do not buy! They suck!!
1 reply from DashingDiva_USA team - 3 months ago
Oh no! That's not the experience we want you to have. Please reach out to our Customer Service team at info@dashingdiva.com, and we’ll be happy to assist with tips and troubleshooting. If possible, please include a photo of the set applied to your nails, along with a photo of your receipt. Our team is available Monday through Friday, from 9:00 AM to 5:00 PM EST.
4 out of 5 stars
Thumbs up graphic, would recommend
30 July, 2025Verified purchase
Great option.
I’ve had a really good first experience with these. First hand had more user error, second hand perfect. Expect next try to be better. The part by the cuticle starts to lift on me and hair gets tangled and ripped out but - I think with my next application this will improve so I spend extra time on the cuticle area application. The stays on and strong- follow directions and trim to your nail length and file. My thin weak peeling nails are growing. Had to take one off - because I got a splinter under my nail and infection- and it did peel my nail a bit- I didn’t have oil, only soap and hot water. I think with oil will peel off with no nail peeling- but have yet to try. 1 stat off for lifting by cuticle and nail peeling with removal but again these may be 1st time user error. No issue with my light as others stated photo is 2 weeks in on beach vacation!
1 reply from dashingdiva team team - 3 months ago
Thank you for sharing your experience with our Glaze strips! We're glad to hear you've found a way to make them work for you. To help minimize nail weakness, consider gently removing the strips and giving your nails some extra TLC. Our Magic Off+ remover can help with gentle removal. We're always here to help with any tips or questions.
1 out of 5 stars
Thumbs down graphic, would not recommend
25 July, 2025Verified purchase
Save your money!
Broke after one use.
1 reply from dashingdiva team team - 3 months ago
Oh no! We're so sorry to hear about your experience. Please reach out to our Customer Service team at info@dashingdiva.com, and we’ll be happy to assist with tips and troubleshooting. If possible, please include a photo of the set applied to your nails, along with your order number or a photo of your receipt. Our team is available Monday through Friday, from 9:00 AM to 5:00 PM EST.
1 out of 5 stars
Thumbs down graphic, would not recommend
20 July, 2025
Danger - May Cause Acrylate Allergy
I purchased this kit, excited to be able to do my nails at home. Seemed like a great deal—the light & a set of nails to get you going. Here’s the problem: the light is simply not strong enough to cure the gel. I cured the gel 5+ times and still it remained sticky/squishy. This is a huge problem because the gel strips contain methacrylate monomers which, when not cured properly, remain in contact with the nails/skin for days and can seep into the nail & surrounding area, and over time can cause you to develop an allergy to acrylates. Acrylates are in many things including gel nail polish, composite dental fillings, eyelash glue, hair color/bleach… and many other things you wouldn’t even think would contain acrylates. Don’t risk your health for a $12 nail kit—it’s easier and safer to purchase press ons.
1 reply from DashingDiva_USA team - 4 months ago
Thank you for your review. We take consumer feedback very seriously and want to assure you that our Glaze Gel Nail Strips do not contain methacrylate monomers. It does, however, sound like your lamp needs to be replaced. We’re sorry about that. Our Glaze lamp comes with a warranty -- please reach out to our Customer Support team at info@dashingdiva.com so they can help get you a replacement.
5 out of 5 stars
14 July, 2025
originally posted on dashingdiva.com

Great for thin damaged nails!
I really damaged my nails after a salon-gel disaster and needed something stronger than normal nail hardeners. I tried Glaze Strong on my three worst nails and am so impressed that I'm going to do a full set today. I loved the transparency and natural look, and they are STRONG! I'm hoping that removal is as damage free as advertised because I'm going to need support and protection for my nail for the next few months!
1 out of 5 stars
Thumbs down graphic, would not recommend
6 July, 2025
Broken light
LED light was broken when I opened it, I just purchased this within the hour and when I opened the led light, the port to where the charging cable connects was inside the light, not attached. Therefore I couldn’t use it at all. I was looking forward to trying this kit out and it disappointed me
1 reply from DashingDiva_USA team - 3 months ago
Oh no! We're so sorry to hear about your experience. Please reach out to our Customer Service team at info@dashingdiva.com, and we’ll be happy to assist with tips and troubleshooting. If possible, please include a photo of the set applied to your nails, along with your order number or a photo of your receipt. Our team is available Monday through Friday, from 9:00 AM to 5:00 PM EST.
4 out of 5 stars
Thumbs down graphic, would not recommend
30 June, 2025Verified purchase
Unsure of light
Not sure if it is a malfunctioning one or how it is but the light flashes and not constant 45sec so it doesn't cure the "nail" properly.
1 reply from DashingDiva_USA team - 3 months ago
Oh no! We're so sorry to hear about your experience. Please reach out to our Customer Service team at info@dashingdiva.com, and we’ll be happy to assist with tips and troubleshooting. If possible, please include a photo of the set applied to your nails, along with your order number or a photo of your receipt. Our team is available Monday through Friday, from 9:00 AM to 5:00 PM EST.
2 out of 5 stars
Thumbs down graphic, would not recommend
25 June, 2025
Decent nails- horrible UV lamp
Loved the color of the nails & the thickness of each one Did not like the UV lamp bc it broke before I could cure my right hand!
1 reply from DashingDiva_USA team - 3 months ago
Oh no, this was never the experience we intended for you. Please reach out to our Customer Support team at info@.dashingdiva.com for assistance.